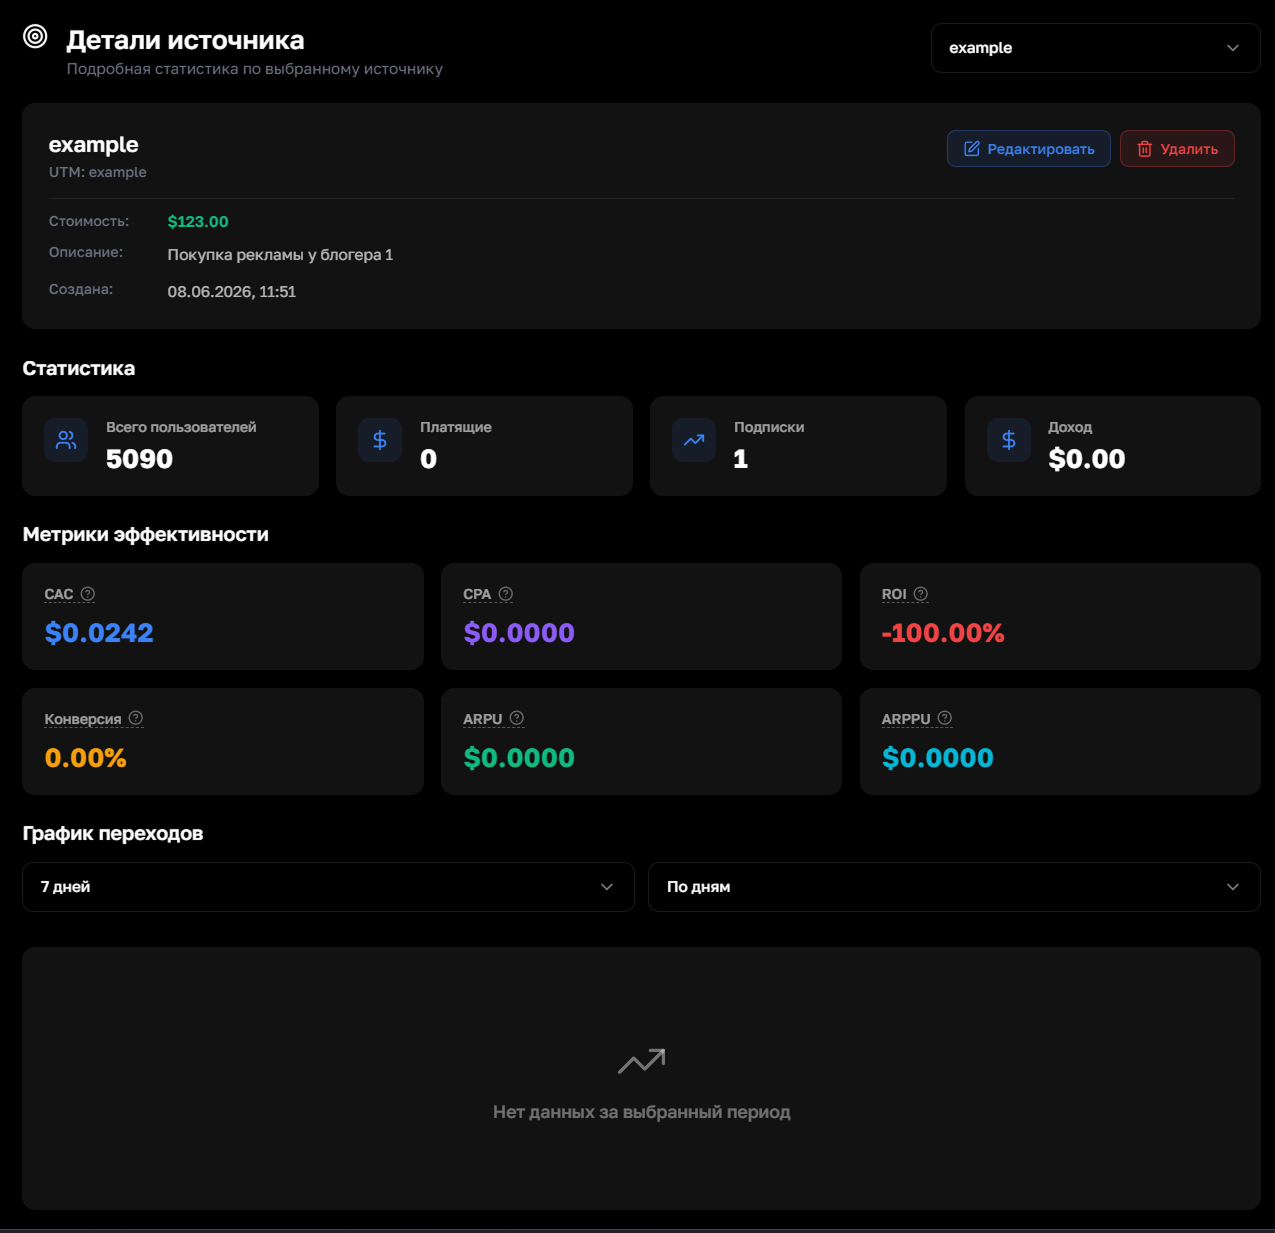
UTM Tags
UTM tags let you track where users come to the bot from. A unique link is generated for each traffic source, and all clicks on it are recorded in the analytics. You can create separate campaigns for each tag and track their performance
Step 1. Open the bot
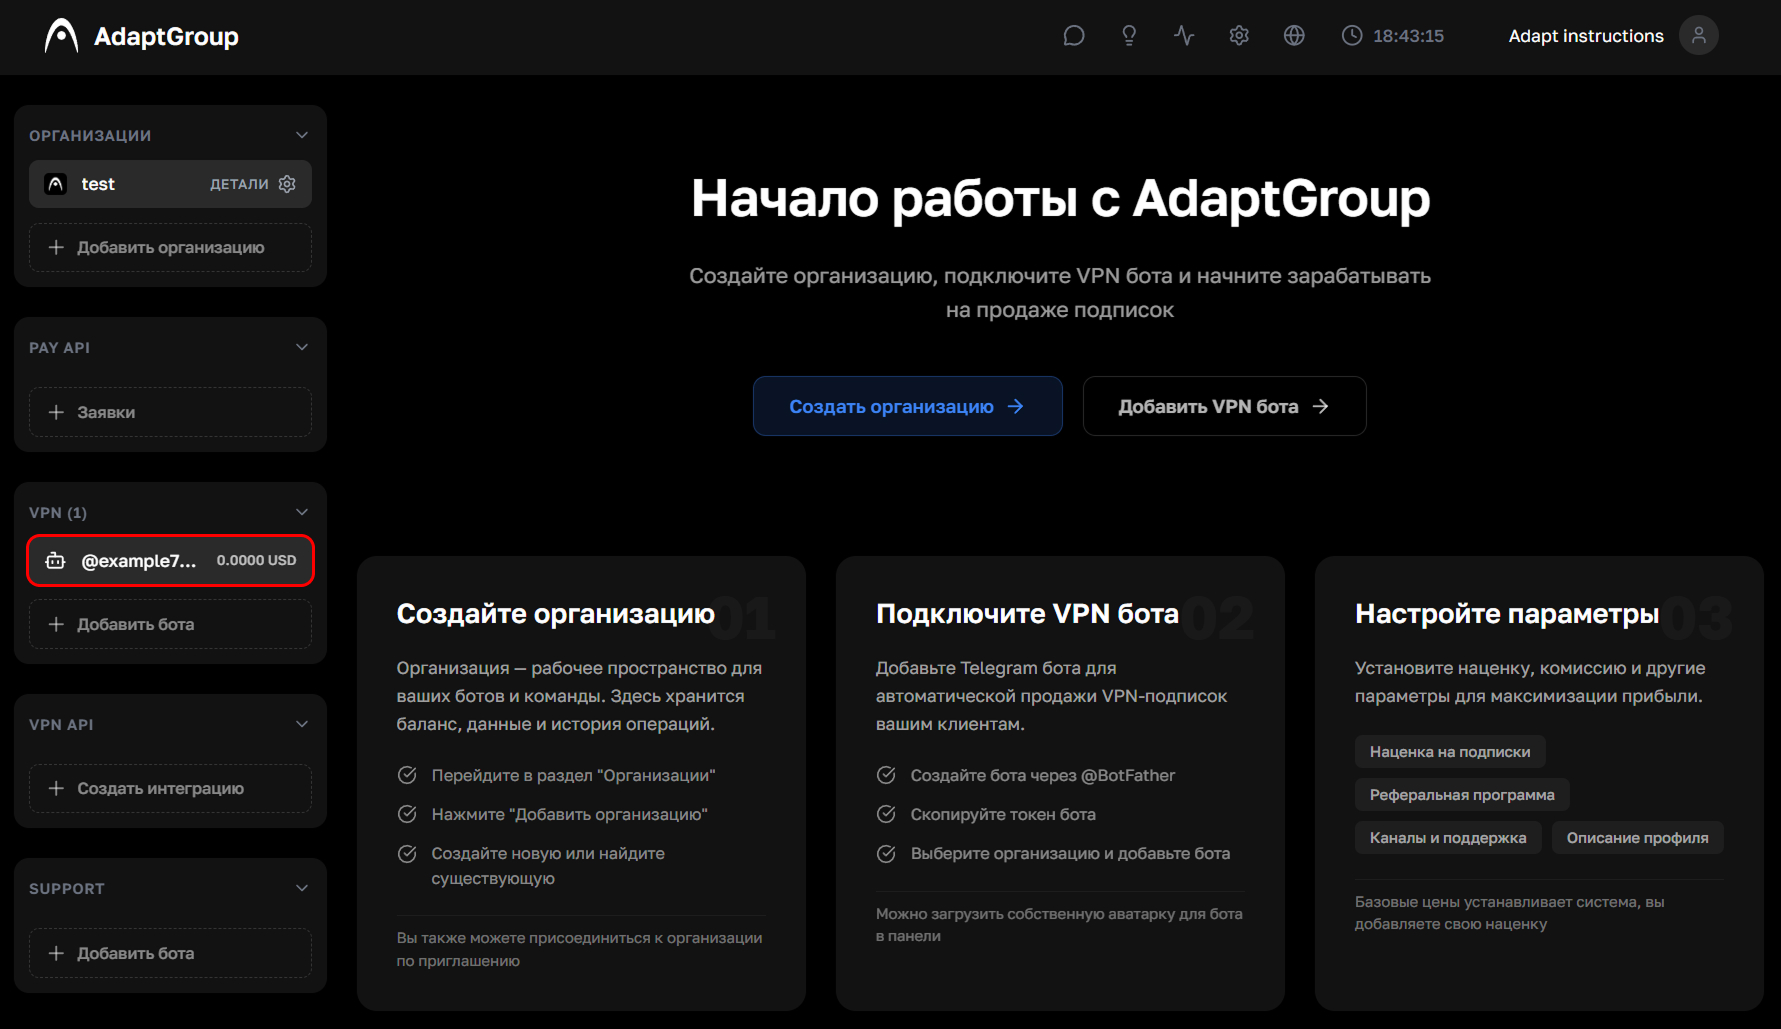
In the left sidebar, in the VPN section, click on the bot you need
Show screenshot
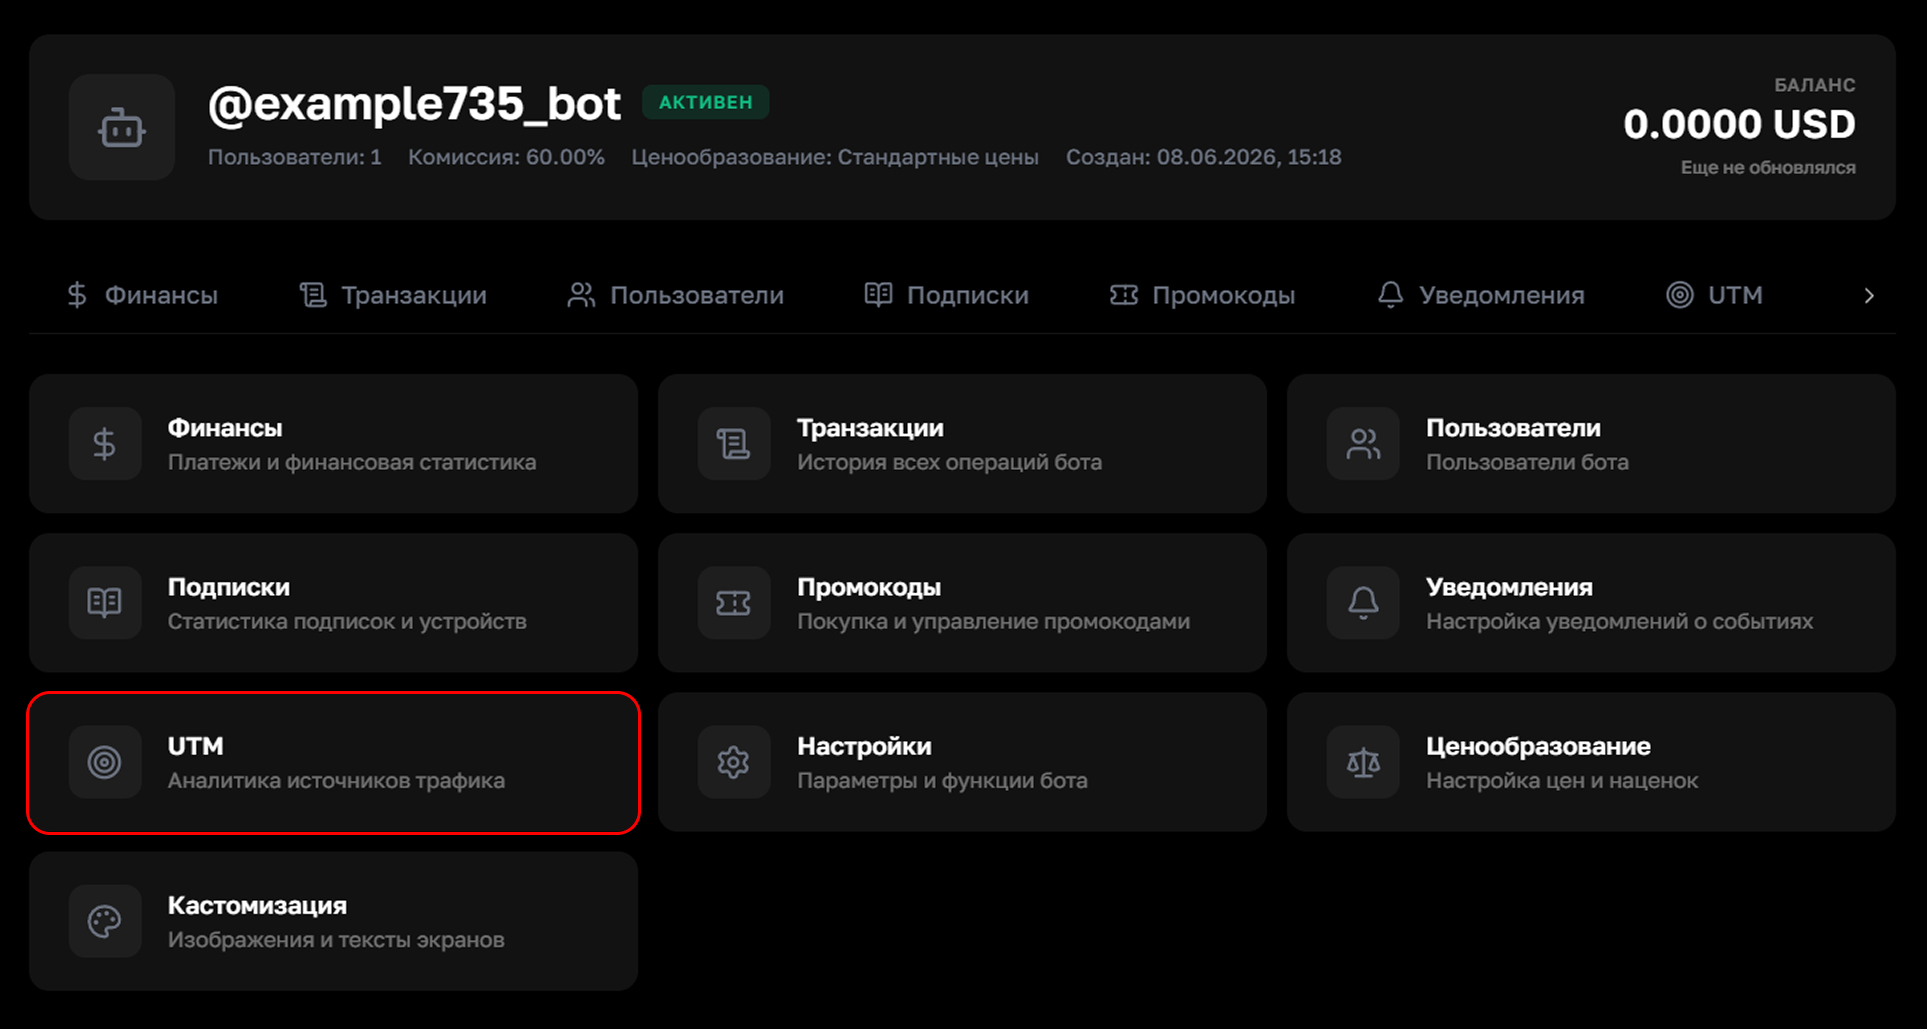
Step 2. Go to the "UTM" section
On the bot's page, click on the "UTM" tile
Show screenshot
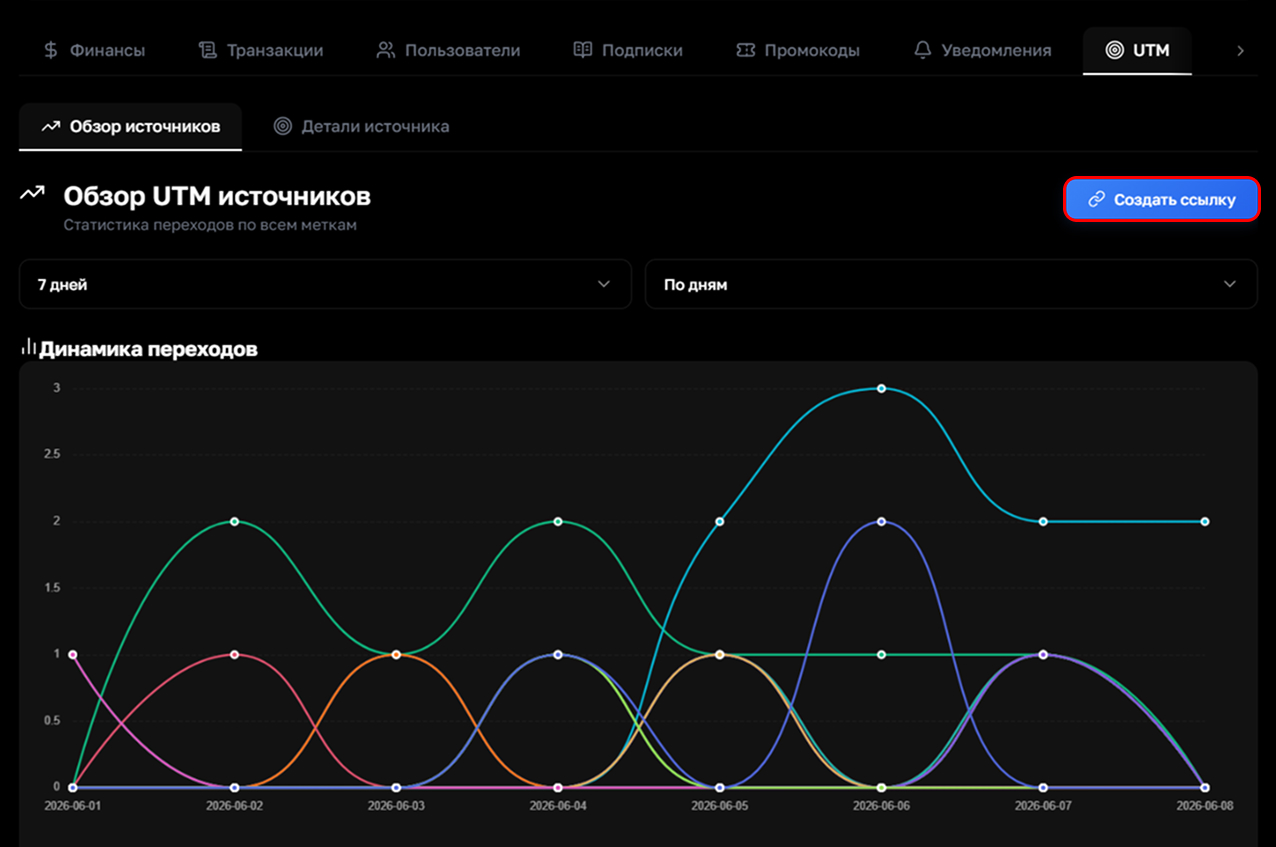
Step 3. Review the source overview
The "Overview" tab displays a graph of click trends across all tags for the selected period. You can switch the time range and view activity for each source
Show screenshot
Step 4. Create a UTM link
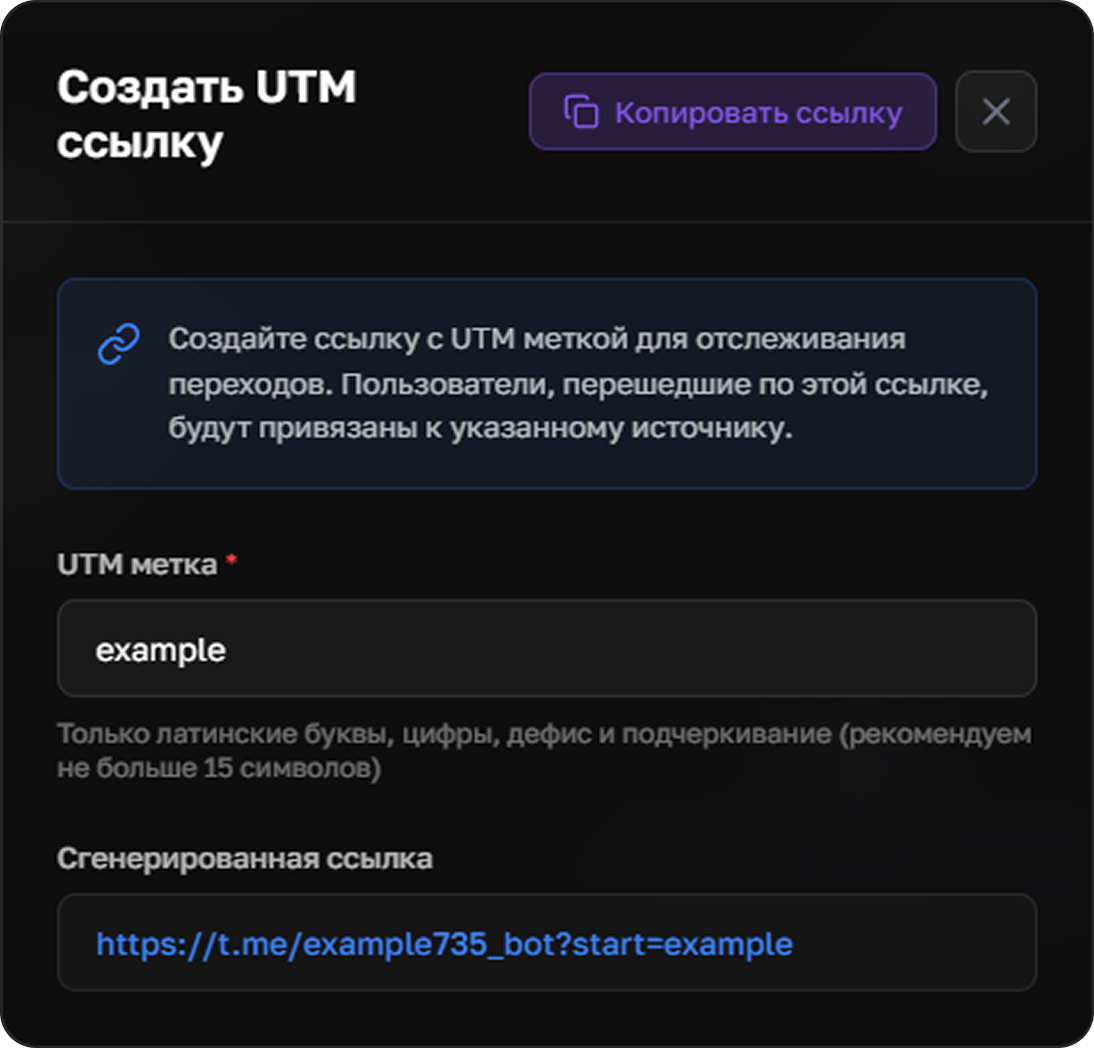
Click "Create Link", enter the tag name using Latin letters and copy the generated link. Any user who clicks it will automatically be linked to this source in the analytics
Show screenshot
Step 5. Create a campaign
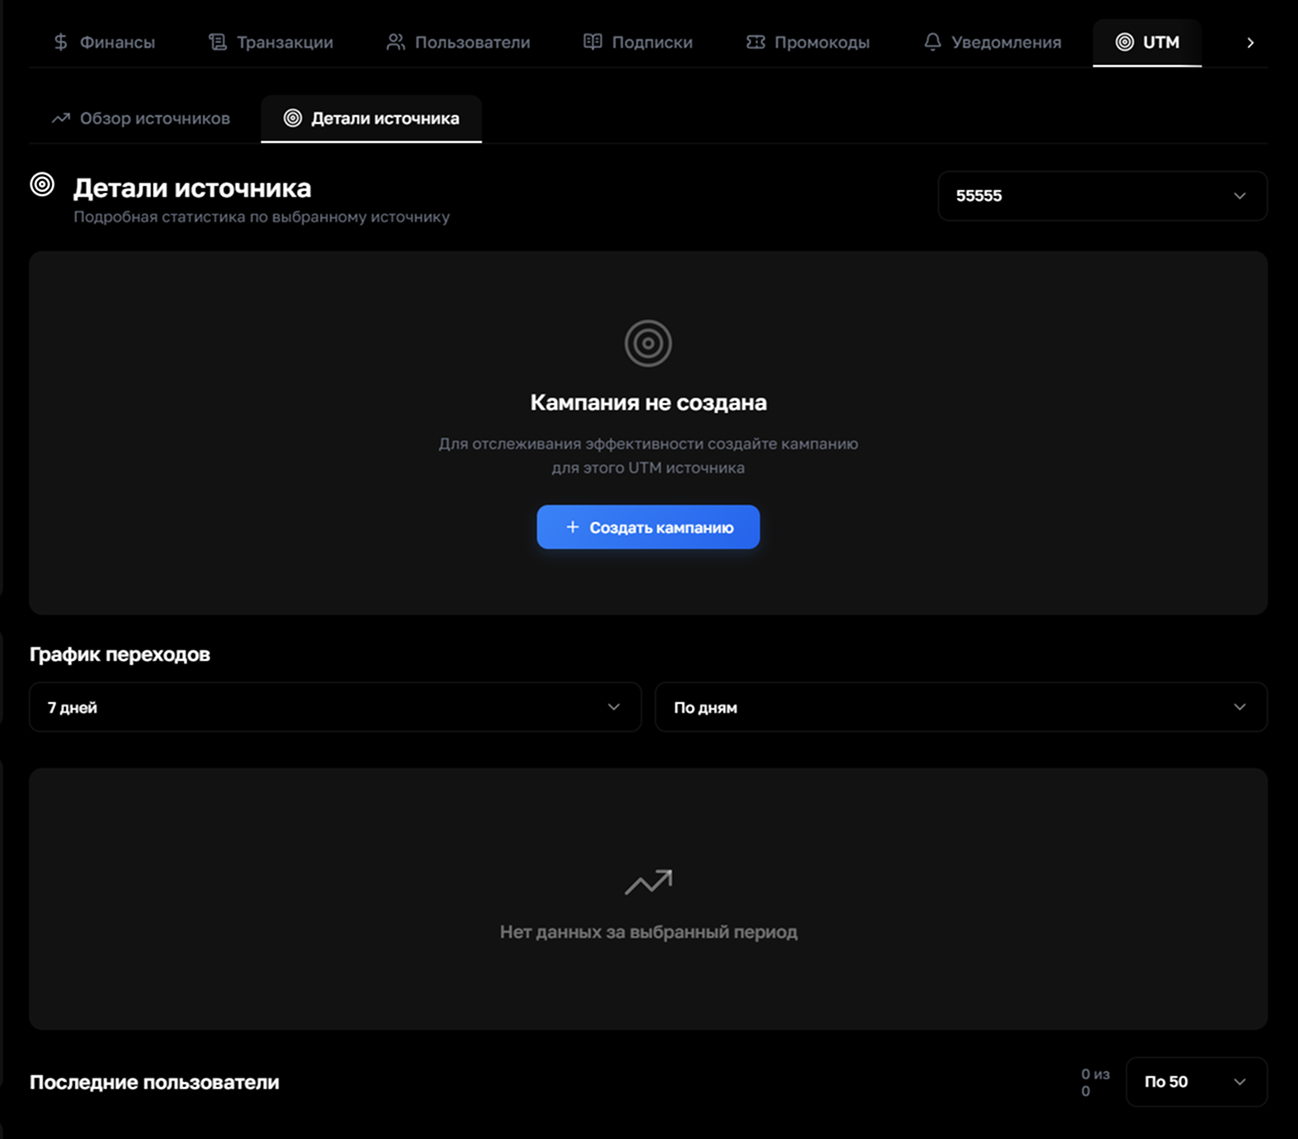
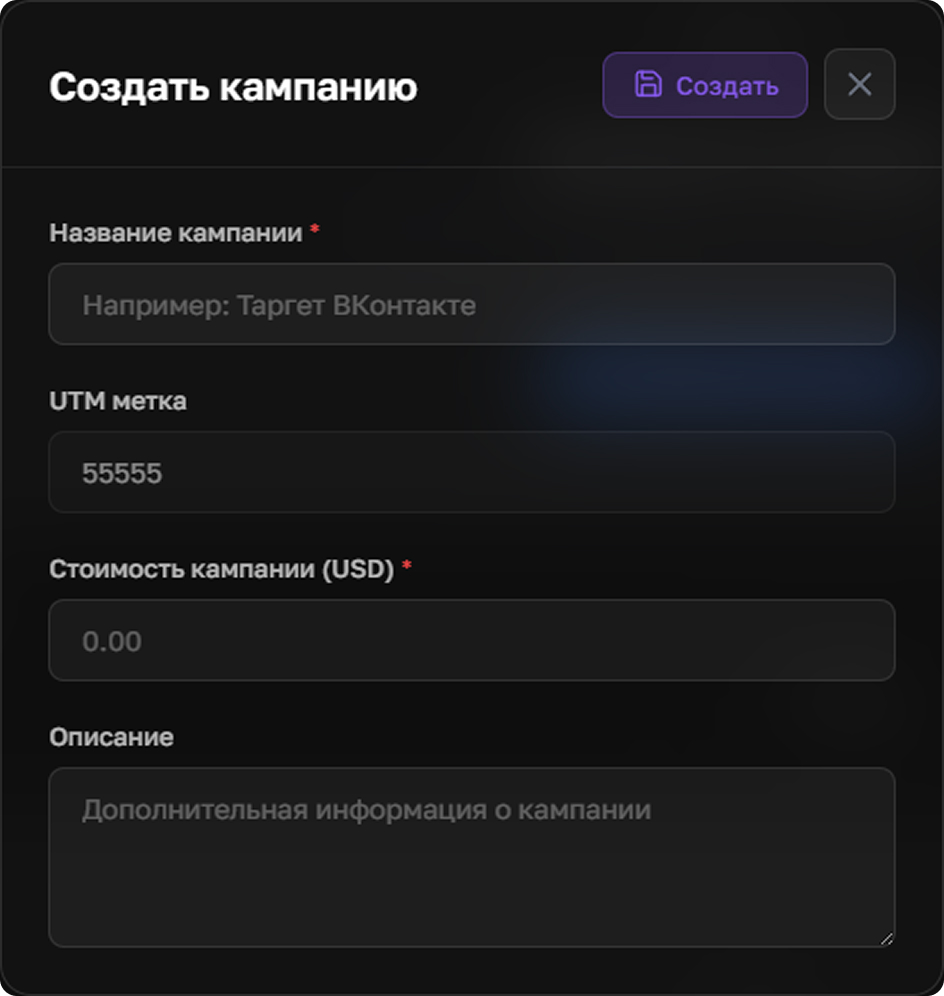
On the "Source Details" tab, select the tag you need and click "Create Campaign". Specify a name, a budget in dollars, and add a note if you wish. After launching, the system will start tracking performance for this tag
Show screenshot
Show the campaign creation form
Step 6. Analyze the results
After launching a campaign, detailed statistics become available — the number of acquired users, paying customers, revenue, customer acquisition cost (CAC), return on investment (ROI) and purchase conversion rate. The campaign can be edited or deleted
Show screenshot